
How to Fix Bubbles in Resin Art and Keep Layers Clear
A torch isn’t always the first fix for bubbles in resin art. Knowing how to fix bubbles in resin art starts with identifying where they are: a quick, light pass over wet resin can pop surface bubbles, while tiny bubbles may call for warmer resin, careful mixing, and slower pours. Keep each heat application to 1-3 seconds, and let the resin cool for several minutes before repeating.
If a cloudy or dotted finish feels frustrating, it helps to know that bubbles often have a practical cause, such as trapped air or resin that’s too cool to flow easily. This guide explains when heat can help, how warming resin in a water bath for 20 minutes can help address tiny bubbles, and how to reduce bubbles and dust as you build clear layers. You’ll also learn what to do when bubbles appear after curing, so you can choose a repair that suits the stage your piece is in.
Table of Contents
Why Are There Bubbles In My Resin?
To understand how to fix bubbles in resin art, first identify where they formed. Wood, leaves, and some paper can release air or moisture after being covered with resin. Seal porous materials with a thin layer of resin, then add the main coat once the first layer has set. In pressure-pot casting, maintain pressure throughout the process. A vacuum chamber is a separate method, so pressure-pot instructions do not apply.
Locate the bubble before choosing a repair. Surface bubbles sit on wet resin, while others cling to an inclusion or remain inside cured resin. A cluster near a wood edge can indicate air escaping from the material. Identifying the location helps you choose how to fix bubbles in resin art without applying a method that can’t reach the defect.
Guide bubbles away from inclusions and mold corners. In a small bezel or mold, use a pin or toothpick to nudge a stubborn bubble toward the centre. It’s easier to reach there. Work carefully around embedded leaves or paper so the tool doesn’t shift or damage the details. Touch exposed bubbles gently.
Use heat only on wet surface bubbles. Sweep a torch or heat gun quickly over the resin, keeping it moving to avoid scorching or overheating. Limit each application to 1-3 seconds, then wait several minutes for the resin to cool. Repeat 1-3 times if needed. Heat won’t reach bubbles sealed beneath an inclusion or inside cured resin.
Lift dust before the resin sets. Inspect wet resin in a tidy workspace. If dust lands while the surface is still workable, lift it gently with a toothpick. Avoid dragging the particle across the artwork, which can leave a mark.
Repair bubbles in cured resin with a fresh coat. Sand the affected area until it’s even, then remove all sanding residue. Apply a fresh, thin coat of resin over the clean surface. This gives the repair a smoother finish without trying to heat a bubble that’s already sealed inside cured resin.
Using a torch to pop surface bubbles
Heat can help surface bubbles rise and pop while the resin is wet. Make short, moving passes, then pause to let the surface cool.
Choose a Torch or Heat Gun
Choose a torch or heat gun that lets you sweep heat across the resin without lingering in one spot. Watch the surface as you work: exposed bubbles may rise and break, but bubbles beneath inclusions or inside cured resin will not respond to surface heat. Keep the tool moving, especially around thin edges and delicate details.
Use Heat Safely
Keep the torch or heat gun moving and avoid holding it too close to the resin. A brief pass limits the chance of scorching or overheating the surface. Apply heat for 1-3 seconds at a time, then wait several minutes for the resin to cool. Repeat 1-3 times if surface bubbles remain.
Confirm the resin is still wet. Look for bubbles sitting on the exposed surface, rather than beneath an inclusion or inside cured resin. Heat is for surface bubbles; it won’t repair those other defects.
Sweep once across the affected area. Move the torch or heat gun quickly over the resin. Keep it away from any single spot, and watch whether the bubbles rise and pop. Don’t pause over a stubborn bubble; allow the surface to cool before another brief pass.
Pause and reassess before repeating. Give the resin several minutes to cool between applications, then inspect it under good light. Stop once the surface bubbles have popped. If bubbles remain trapped beneath a leaf or other inclusion, use a pin or toothpick while the resin is workable instead of applying repeated heat.
For a guided setting to practise controlled resin techniques, explore resin art practice.
Bubble and dust control for clear, layered artwork
For clearer layers, prepare the mixture carefully, pour steadily, and protect each wet surface from dust. Follow these steps before and during the pour.
Remove Bubbles Before PouringMix the resin and hardener slowly, scraping the sides and bottom of the container. This helps combine the components while reducing the air whipped into the mixture. Pour slowly and smoothly from a spout held two to four inches above the surface. Avoid pouring onto the same stream of resin, which can fold in air.
Control Bubbles in Molds and Deep PoursFill an intricate mold by pouring resin around every side before filling its centre. This helps resin reach narrow edges where bubbles can cling. For pressure-pot casting, keep pressure on throughout the entire process. In a layered piece, pour in thin layers and allow each layer to rest before continuing.
Pour in a controlled sequence.Hold the spout steady and guide the resin across the surface instead of dropping it in one spot. For a mold with detailed corners, trace the outer edges first, then fill the centre. This gives the resin time to flow into recesses and reduces the chance of trapping air along the sides.
Protect the wet layer from dust.Work in a tidy space with fewer airborne particles, then leave the artwork undisturbed while the layer rests. If dust lands before the resin sets, lift it gently with a toothpick while the surface is still workable. Avoid sweeping or blowing near the piece, as this can send more particles onto the resin.
Inspect each layer before adding the next.Before pouring again, check the surface for bubbles or dust. If a bubble appears near a mold edge, guide it towards the centre with a pin or toothpick while the resin is still workable. A steady pour, clean surface, and careful edge check help preserve clear layers.
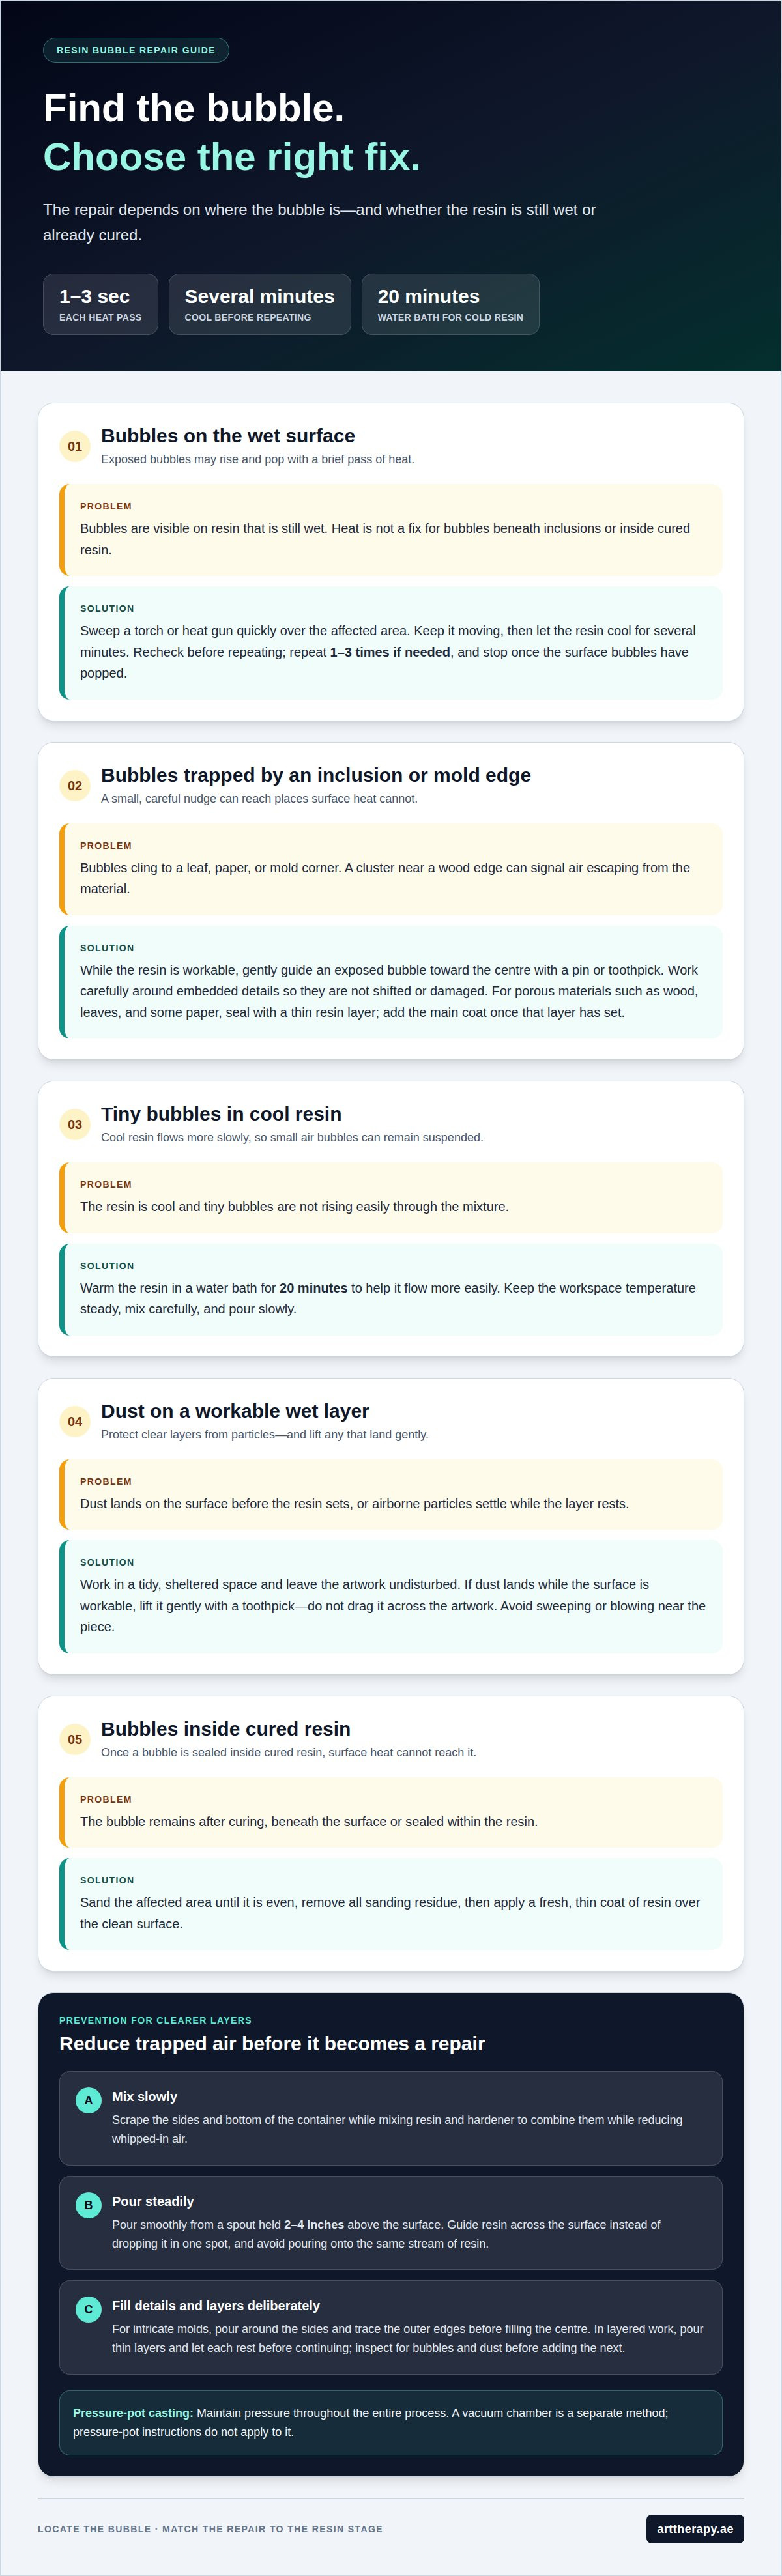
Cold resin and tiny bubbles
Cool resin flows more slowly, so tiny air bubbles may remain suspended instead of rising. Warming the material and keeping the workspace at a suitable, steady temperature can help the resin flow more easily.
Check the room temperature before mixing.Workspace temperature recommendations can vary, so check the guidance for your resin and hardener. These ranges differ, so use the temperature guidance for your resin and hardener. Keep the room steady during mixing and curing, rather than moving the artwork between cooler and warmer spaces.
Warm cold resin gently in a water bath.Place the resin container in a water bath for 20 minutes before mixing. Keep water out of the resin, then dry the container before opening it. Gentle warming can lower the resin’s viscosity, helping small bubbles move upward. Don’t use direct heat on the container, which can warm the material unevenly.
Let visible bubbles rise after mixing.How long should resin sit before pouring to reduce bubbles? There is no single wait time for every mixture. After mixing, pause until visible bubbles rise, then pour. The resin’s temperature and thickness affect how quickly they escape. Avoid waiting so long that the resin starts to thicken or cure.
Use the surface as your cue before pouring.After the pause, check the mixture under good light. If it still looks full of tiny bubbles, give them more time to rise, as long as the resin remains fluid. Pour slowly once the mixture clears: a fast stream can introduce fresh air and undo the benefit of warming.
Match the method to the resin’s condition.If cold resin has become noticeably thick, gentle warming before mixing can help it flow. If it is already curing, do not try to thin it with extra heat. The key is consistent temperature: warm the material, keep the workspace steady, and pour while the mixture remains workable.
For guided practice with temperature-aware resin techniques, explore a hands-on resin art session.
Art Therapy: Resin Art Workshop
Art Therapy’s Resin Art Workshop offers a natural next step if you’d like to practise resin techniques beyond troubleshooting a single piece. It’s a chance to explore the creative process, observe how resin moves, and build confidence working toward clear layers. Bring your curiosity about bubbles, pouring, and embedded details, and use the workshop to deepen your understanding through making.
If you’re still deciding whether resin suits your next artwork, Art Therapy also offers Acrylic Painting, Oil Painting, and 3D Texture Art Workshops. Each offers a different way to explore colour, surface, and texture without relying on resin for every idea. Choose the process that feels right for the piece you want to create, and let experimentation guide the result.
Contact Art Therapy to find out more about the Resin Art Workshop.
Let Your Next Piece Begin With Intention
Learning how to fix bubbles in resin art is also an opportunity to approach each new piece with curiosity. Instead of changing several things at once, make one adjustment in your next pour and observe the result. A small test piece lets you explore an inclusion, surface, or arrangement before committing to a larger design.
Let the process guide you. Each pour offers a chance to notice how materials respond and to make choices that feel more deliberate. If you’d like a welcoming space to keep exploring resin techniques, contact Art Therapy about the Resin Art Workshop. A clear finish can be rewarding, but the care and discovery along the way belong to the creative work, too.
Frequently Asked Questions
Why do bubbles form in resin art?
Bubbles can come from air stirred into the mixture, air escaping from porous inclusions, or resin flowing too slowly. A wood slice, for example, may release air after it is covered, while fast stirring can disperse air throughout the resin. Note where the bubbles gather: around an inclusion, at a mold edge, or across the surface. Their location can help reveal the likely cause.
How do you pop bubbles in resin after pouring?
For exposed surface bubbles, sweep a torch or heat gun quickly over wet resin, using brief passes and pauses between them. A bubble trapped beside an embedded leaf may need gentle guidance with a pin instead. Make sure the resin is still workable before touching it, and do not use surface heat to try to remove bubbles sealed inside cured resin.
What heat tool is safest for removing bubbles from resin art?
Neither a torch nor a heat gun is automatically safe if it stays close to one spot or heats the resin too long. Choose a tool you can move steadily across the surface, and follow its operating directions. Keep each pass brief, watch the resin as you work, and pause between applications. The aim is to release surface bubbles without scorching or overheating the piece.
How do mixing speed and technique affect bubbles in resin?
Fast, vigorous stirring can pull more air into resin, leaving bubbles dispersed through the mixture. Mix slowly and deliberately, scraping the sides and bottom of the container so the resin and hardener combine without whipping in excess air. Beating the mixture like batter, for example, can introduce more air than steady folding and scraping. Careful mixing supports a clearer pour.
What are the risks of using a torch or heat gun on resin?
Holding heat too close or lingering over one area can scorch or overheat wet resin. Repeated applications without cooling time can expose the same section to unnecessary heat. Keep the tool moving, limit each pass to a brief sweep, and pause to reassess the surface. Heat addresses exposed surface bubbles only; it will not correct bubbles trapped inside cured resin.
How can you fix cured resin art with bubbles?
Sand the cured area to smooth the defect, then remove the sanding residue before applying a fresh, thin coat of resin. If a small bubble has left a visible crater, for example, focus on sanding that uneven area rather than scraping the entire artwork. A clean surface gives the new coat a better base. Heat will not release bubbles already sealed inside cured resin.


Comments